How to unlink Aadhaar from Bank, Digital Wallet & Other Service Providers?

Good News!!

The Supreme Court has ruled that citizens of India do not have to link their aadhar number to a range of services such as bank account, mobile sim, digital wallet (paytm), passport, etc. However, the Supreme Court has said that biometric ID is mandatory for accessing social welfare schemes and subsidies such as, LPG subsidy, Jan Dhan Yojana, etc.

aadhar card linking

Last year a lot of stress was there for having an Aadhar card and urgently linking the aadhar to avail public and private sector services. That panic state in the country made us link our aadhar with a bank account, sim card, investments (KYC updation) and whatnot.

After all, there so many questions were raised on the basis of the Right to Privacy and Right to avail the basic services which should not be stopped on the question of not having aadhar card number.

There were so many news such as,

After all these, the verdict of Aadhar not mandatory has been passed.

So, now it is a good news for those you never had an aadhar and never got it linked with anything. However, for those who have linked the aadhar with their private accounts and are concern about their private information getting hacked, may delink the aadhar.

Process of Un-linking

Now, the question arises is it so easy to delink? Do I again need to stand in the queues at post office and banks for hours for delinking my aadhar? The answer is NO. Because, Aadhar delinking is optional and not mandatory. If you feel insure that your private information may get leaked than you should delink your aadhar number.

Below given are the processes of delinking aadhar from Post Offices, Bank, Digital Wallet, and Mobile operator.

1. How to unlink aadhar from Bank Account

Before proceeding to unlink Aadhaar from Bank, first, make sure that your Bank Account is not linked for any DBT (Direct Benefit Transfer). If you unlink the Aadhaar with the bank which is linked for DBT (like Gas subsidy), then you may not receive the DBT money in your account. Hence, try to unlink Aadhaar from bank cautiously. Following are the steps for delinking aadhar from bank.

  1. Visit your branch
  2. Ask customer service to give you Aadhaar De-Link Form.
  3. Submit the de-link form
  4. Within 48 hours your Aadhaar details will be de-linked from your bank account.
  5. Cross-check after 48 hours whether it has been de-linked or not.

2. How to unlink aadhar from Post Office Account

For delinking aadhar card number from post office accounts, you just need to submit a form of delinking of Aadhar Number. This is how Indian post office payment bank de-link form looks like.

how to delink aadhar from post office schemes

3. How to unlink aadhar from digital wallets such as Paytm, Mobikwik, Freecharge

  1. Call the customer care and ask for the procedure to de-link.
  2. You will receive an e-mail to attach a soft copy of your Aadhaar.
  3. After sending the e-mail, you will receive a reply stating that within 72 hours (depends from company to company) your Aadhaar will be de-linked.
  4. Cross check again after 72 hours with the customer care.

4.How to unlink aadhar from sim card companies such as jio, Vodafone, idea, etc.

  1. Call the customer care and request for unlinking aadhar.
  2. You may be asked to send an e-mail with a request to de-link your Aadhaar details.
  3. Once you send it, then they will send you the confirmed message of unlinking Aadhaar.

There might be some difference in the process of delinking for every service provider. Because as of now there are no standard rules set up for delinking. So, you may directly contact the customer care of the service provider and they will guide you on the exact process.

Please feel free to comment on how fruitful this article was.

4 Steps to check your Aadhaar authentication history online (VIDEO INSIDE)

Do you know where was your aadhaar number used for various purposes in the past?

Aadhaar has now become a central part of our life and it’s integrated with so many services. You have your critical information linked to aadhaar, and if you allow a service to authentic yourself using aadhaar number, it fetches your data and uses it.

While it has made life easy and simple, it also opens up to the chances of data leak and someone else using your aadhaar to authenticate for some service.

UIDAI has come up with a service where you can check Aadhaar Authentication History online. Below is a quick video which shows you how you can do it.

The main objective or purpose of this authentication process is to verify the identity of a person and to avoid the fraudulent cases. It helps the service provider to identify whether the person who is requesting for the service is trustworthy or not.

How does the process of authentication work?

When you submit your Aadhaar card at anywhere as an identity proof, that service provider asks you either to submit a copy of your Aadhaar card or sometimes he may ask for your bio-metric details like fingerprint or IRIS.

These details are then submitted to the CIDR of UIDAI i.e. Aadhaar verification department. This request can be initiated through any devise like laptops/desktops or mobiles. CIDR then cross checks this information with the details on UIDAI.

If your details match then the service provider will approve your request.

Aadhaar authentication can be done on the basis of 3 means –

  • Bio-metric details – Finger print and IRIS
  • Demographic details – Name, age, gender, DOB etc.
  • One time password – on registered mobile number

Any service provider where you submit your Aadhaar card as an ID proof can request CIDR for this authentication.

4 steps to check your UIDAI authentication history?

Let’s see these steps briefly –

Step #1: Go to the website of UIDAI or you can click here, and then click on “Aadhaar authentication history”

Aadhaar authentication

Step #2 – Enter your Aadhaar number and security code and click on generate OTP.

Aadhaar authentication

Step #3 – Now select the type of authentication history which you want to check. Then select the time period and how many entries you want to check (You can select maximum 50 entries). Finally enter the OTP you received on your registered mobile number after step 2 and click on submit.

Aadhaar authentication

Step #4 – This is the last step of this process where you can see the list of all the entries of authentication process.

Aadhaar authentication

Do let us know if you liked this information and if it helped you !

How to Lock and Unlock Biometrics details in Your Aadhaar Card?

Aadhaar card is becoming the most important documents for any individual in India. Isn’t it very critical to secure crucial details from hackers who might try to steal your data? Some months back, even MS Dhoni’s Aadhaar data was leaked.

So today we will talk on how you can secure your Aadhaar card bio-metric details and prevent others to access your data, and also how to unlock it back later.

secure Aadhaar card

Why unlock your Aadhaar card details?

At the time of applying for Aadhaar card, you gave your photo, fingerprints and iris details (eye scan) which is called biometric details.

Nowadays, every organization like phone companies, financial organizations have come up with the concept of e-KYC, where they will just enter your 12 digit Aadhaar number into their Aadhaar-based authentication system instead of asking for all your details when you want to open an account, and it will access all your information like name, date of birth, address etc. from the Aadhaar database.

Details of information captured in Aadhaar:

  • Photo
  • Signature
  • Full name
  • Address
  • Mobile number
  • Date of birth
  • Education
  • Bio-metric
  • Bank details etc.

If you lock your bio-metric details then no one will have the authority to use it without your permission. Not even any government institution. If you want to perform e-KYC then you can unlock it for 10 minutes, after that it will lock again automatically.

This locking and unlocking can be done only through online and your mobile number or mail ID must be registered in your Aadhaar.

How to Lock your Aadhaar card Details?

Lock unlock Aadhaar details

  • Read the details given above the page so that you come to know about the facility in detail.
  • Fill your Aadhaar number and the security code and click on Send OTP.
  • Enter the OTP you received on your registered mobile number and press enter.
  • Then click on Enable locking option.
  • Your Aadhaar bio-metric details are safe now.

How to Unlock your Aadhaar Details?

Unlocking Aadhaar details gives you two options which are unlocking on a temporary basis and on a permanent basis. Here are the steps to unlock.

  • Visit the official website of Aadhaar card i.e. UIDAI
  • Click on Lock/Unlock bio-metrics.
  • Enter your Aadhaar number and security code and click on Send OTP
  • Enter the OTP received.
  • Now if you want to unlock your details for temporary then click on “Unlock It”.
  • And if you want to Unlock your details permanently then uncheck the checkbox of “Lock” and click on “Disable Locking”

Why do we need to safeguard our Aadhaar details?

It is of utmost importance to secure yourAadhaar card details. Let us know why we need to secure our Aadhaar details.

  • As we all know that Aadhaar card is becoming the Unique identification and in future every legal procedure will be Aadhaar verified. This means that if someone has your Aadhaar details then he/she can take advantage of your details and misuse your Aadhaar card.
  • Various companies have taken contracts of issuing Aadhaar cards. So they had taken the biometric details of every person who enrolled for Aadhaar card through these companies. Now as these companies have your details there is a possibility that they may misuse these details for their own purpose.
  • The experts have said that the details provided in the Aadhaar card should be secured so that no one can take advantage of any other person’s personal details.
  • This newly introduced safety feature can help you to secure your details and only you have the authority to unlock the details whenever you wanted. No other person, company or bank has permission to use these details without your permission.

For this, your registered mobile number must be in use because the OTP required will be sent on the registered number.

You can click on this video given below to see the feature.


What if I happen if my mobile number or E-mail ID is not registered?

As per our conversation with the Aadhaar customer care executive on their contact No. 1947, if you don’t have your registered mobile number or E-mail ID in use, you cannot go further for the online procedure to update or Lock/Unlock your details.

In that case, you have to visit the Aadhaar center with the Xerox copy of your Aadhaar, fill the required details and submit it.

To search the nearby Aadhaar center you can visit this link. Or you can download & fill the form by yourself, attach the copy of your Aadhaar and send it by post on the address given on the form.


DigiLocker – A Free and Secure way to store your important documents online

Digilocker is a Digital Locker service provided by the Indian Government for the citizens to reduce the efforts of carrying hard copies of their documents everywhere. It is a part of the digital India campaign.

Many times it is difficult to carry the hard copies of your documents everywhere. And there is also the possibility of misplacing or losing your documents. So to reduce your efforts and keep your documents safer, the government has introduced this new feature where you can save all documents and use them whenever you want.

Now, let’s see how digilocker works.

DigiLocker

 Key Components of Digilocker

When you log in to Digilocker account, on the first page you can see some key components which are useful for the user. These key points are as:

  • Dashboard
  • Activities
  • Shared documents
  • Issued documents
  • Uploaded documents
  • Issuer
  • Requester

Features of Digilocker:

Digilocker is available in both website and Digi locker app form. Various features of Digilocker make it more attractive and convenient for the users. Some of the main features are listed below:

  1. 1 GB space.
  2. Part of digital India.
  3. Can store both uploaded and issued documents.
  4. You can then also share this URI link of the documents to others when you need to submit your document anywhere.
  5. Both Aadhaar holder and non Aadhaar holders can open this account.
  6. Easy and more secure to use.

What are issued and uploaded documents?

Issued documents: 

Issued documents are the documents which are shared by the issuer to the Digi locker of the user through push or pull way of sharing documents.

Push way means sharing the documents to the Digi-account of the user by using his Aadhaar number to search his Digilocker account if he has already linked it with his Digi-account.

Pull way is the way of sharing documents through URI link if the user doesn’t have his Aadhaar number linked with his Digi-account.

Uploaded documents: 

Uploaded documents are the scanned copies of the documents which are saved by the user to his Digi-account.

How to use DigiLocker?

To take the benefit of Digilocker account you have to sign up first which is very simple. To start a Digi-account first sign up for Digi locker and create a Digi-locker account. Go through the steps given below to sign up for a new Digilocker registration.

Step 1: Download Digilocker app or visit the government authorized Digi locker link https://digilocker.gov.in and click on the sign-up button on your right.

Step 2: Enter your mobile number and click on continue. You will get an OTP on your registered mobile number. Once you enter the OTP and click on continue you will be directed to the next page.

Digilocker signUp step1

Step 3: Now enter your username and password and click on sign up.

Digilocker signUp step2

Step 4: Here you will be asked to enter your Aadhaar number. To link your Aadhaar with your Digi-account, your mobile number must be registered with Aadhaar so that you can get OTP. If your mobile number is not registered with Aadhaar, you can skip this step by clicking on the “continue here” button given below.

Digilocker signUp step3

That’s it. Your Digilocker account is ready to use now.

Digilocker account

You can read the user manual for Digilocker here.

Three entities in Digilocker:

Any person having an Aadhaar card can open a Digilocker and save his documents safely in it. There are generally three categories of people considered as the users of Digilocker. These categories are made on the basis of users of this facility.

Three entities in digilocker

1) Citizens/Individual:

The first category includes the person holding the Digi locker account. The person here has all the authorities regarding his Digi locker. Only he can manage the account. And no one can use his Digilocker documents without his permission. On the other hand, this person can use his documents whenever and wherever he wants.

For example: if you go to any government office for some very urgent work and then you realize that you have forgotten to bring one of your document which is very important. what will you do in such a situation?

If you hold a Digilocker account and have saved a copy of that document in that account then you can take print of that document or can simply share the URI link.

2) Issuer:

The issuer can be any Governmental or private institute or company. This issuer provides the e-documents through URI by using persons Aadhaar number. It will help the issuer and the receiver both to provide the document on time and avoid delay.

Besides, there is no need to send the documents physically to each individual on their respective address and track those documents in case that person doesn’t receive it.

3) Requester:

Requesters is the institute or individual who uses your e-documents through Digilocker for the verification or any other legal procedure. When you provide your URI link to the requester then you don’t need to submit any hard copy of that document.

Requester can be universities or any government officials etc.

Benefits of Digilocker:

  1. All the documents shared are paperless so it reduces the efforts of maintaining the paper documents for government officials.
  2. When you save any document to your Digilocker account you can add you e-sign so that it becomes a more authenticated document with self-attestation.
  3. The issuer can directly issue the documents to an individual which makes the document delivery procedure more safe.
  4. User can use the documents saved in Digilocker anywhere, at any time which proves more convenient for the users.
  5. When you use the URI link of the documents directly shared by the issuers, it reduces the possibilities of submitting fake documents.

#Digilocker helpline:

If you have any complain regarding digilocker then you can send your query at [email protected].


Update your Aadhaar card details online in 5 min and download a new one [VIDEO inside]

Do you want to know how to update aadhaar card details online? Yes – It’s possible. You can easily update your details online without any offline documentation and then download your new aadhaar card online and start using it.

Recently, I wanted to change my address details in my aadhaar card and I completed the whole process online by visiting the website of UIDAI. It was just a few minutes task and very easy. I have also created an online video tutorial with all the steps. Below is the video if you want to refer to it.

8 step process to update your aadhaar card details online

  1. Go to https://ssup.uidai.gov.in/update
  2. Enter your aadhaar card number and text verification code to generate the OTP
  3. Enter your OTP and then on the next screen choose the details you want to change
  4. Enter the details which you want to change and then proceed to upload the documents
  5. Choose the supporting document which you want to upload. Make sure the document is self attested and signed by you and scanned back.
  6. Note down the UTR number which can be used later to check the status

update aadhaar card details online

How to Check the status of your Aadhaar change ?

Once you have submitted the change request, you will get a UTR (Unique request number), which can be used later to check the status of the change. Here is how you check the status later

  • Visit https://ssup.uidai.gov.in/check-status
  • Enter your Aadhaar card number and the UTR number (without slashes)
  • You will get the status. It might be awaiting approval or might have approved already in which case you can then download your new aadhaar cared online and start using it

check status of aadhaar card details change

How to download your new aadhaar card after the update is complete?

  • Visit https://eaadhaar.uidai.gov.in/
  • Choose the option to enter your aadhaar card and enter all details
  • Generate the OTP and enter that to proceed
  • A PDF will get downloaded which can be opened by entered your pin code as the passport
  • You can now start using this new aadhaar card by taking a color Xerox

download aadhaar card online

Cases where you might want to change the aadhaar details

  • Your address might have changed after your aadhaar card was made
  • Incase of name change after marriage in case of female
  • Your mobile number or email id is changed
  • You have changed your name or your name was wrongly captured at the time when you applied for aadhaar card
  • By mistake your gender or date of birth was wrongly captured

I hope this tutorial was clear and easy for you to follow. The process to update aadhaar card details just takes 5 min of your time. Try it and let me know if it worked for you or not. Also do not forget to share this article with your friends circle; it would be very useful for them.

Claiming Assets after Death ? Here are 4 Important documents you need to know about !

Are you sure that when you inherit your parents assets or any other bank accounts later in life, its going to be a smooth process? Will it be hassle free and without any complexities? Are you sure you will not get dragged into life long legal battles with siblings or any other relatives who will fight for the same assets and properties ? Have your parents taken care of all the succession planning like nominating you for those assets and writing a WILL and registering it with help of a lawyer ?

Important Documents to Claim assets

On an average, almost all the families are very weak in their estate planning. They are so much engrossed into their “current” life, that they are not bothered about future much. Its their children and legal heirs who have to suffer later, due to their laziness or ignorance about these matters. In this article I want to highlight few important documents and processes which you should be aware about, so that when the time comes – you are familiar with them.

After the death of the owner of assets ?

After the death of asset holder, after few weeks/months – its time to claim their assets and properties. That time, there are lots of paperwork and procedure to be followed. You have to claim their

  • Fixed deposits
  • Saving bank accounts
  • Bank lockers
  • PPF (Public Provided Funds)
  • EPF (Employee Provided fund)
  • Post Office Deposits
  • Mutual Funds
  • Stocks and Shares
  • Life Insurance Policies
  • NSC
  • Real Estate Property
  • Bonds (If any)

Can you see how long is the List ?

You will have to run around to claim all of these one by one and might also have to do few rounds because of the process and procedures to be followed. Now this verification and processes is very critical for the banks, mutual funds houses, or companies to make sure that the asset is passed to the right hand, who ever is entitled to get it legally and not just anyone making the claim.

Just saying that “I was his Brother” or “I was his wife” will not help much because its not so straight forward process, especially if things dont match on nomination or the WILL. And if the nomination is blank or not on the right person name (who is wanting to file a claim) or worst if WILL is not written at all, then its the start of that frustrating phase, which is about to come. In your world, you might be very clear, who are legal heirs and who deserves the assets, but that’s not the point here. You need proof and all the legal documents and process in place to claim the assets.

So there will be documents asked, forms to be filled and rounds to be made to court to obtain some documents – even if it means frustration and disappointment for the family member of deceased. So you can now get a sense of how important is succession planning, and if one is careful and responsible enough, they will at least do basic things in place like  putting nominations in place and writing and registering a WILL in a standard manner with help from a lawyer.

Some mistakes which most of the investors make 

Let me first list down few mistakes or incomplete things done by investors which create the problems in future. These mistakes happen due to sheer ignorance or because of casual attitude of investors. You or your parents might be doing these following mistakes.

  • They do not mention anyone in Nomination when they open a bank account, open a fixed deposit etc
  • Once they put a nominee, they do not bother to change it ever, even if nominee has died or is now not on their preferred list
  • They do not keep receipts or save important documents
  • They do not write a WILL
  • They write a WILL, but do not register it
  • They write and register a WILL, but do not inform anyone in family
  • They do not consult a lawyer while write a WILL and make mistakes in it
  • They do not do proper paperwork when they execute a buy/sale transaction (Here is a real life experience)
  • They rely too much on words of others and have feel “legal battles” happen only in movies

Can you relate to any of these above ?

Are you doing something similar in your financial life. It answer is “YES”, your family or you yourself might face lot of issues in future as explained above. You seem to be too much busy in earning money or just making investment – without realising that one day it might not even go to someone important in your family or reach very later after a lot of work to be done.

4 Important Documents required to Claim an Asset after death

Lets finally come to the main point and now I will just explain to you some documents which generally come into picture at the time of claiming assets. Here they are –

Documents required to claim assets after death in India
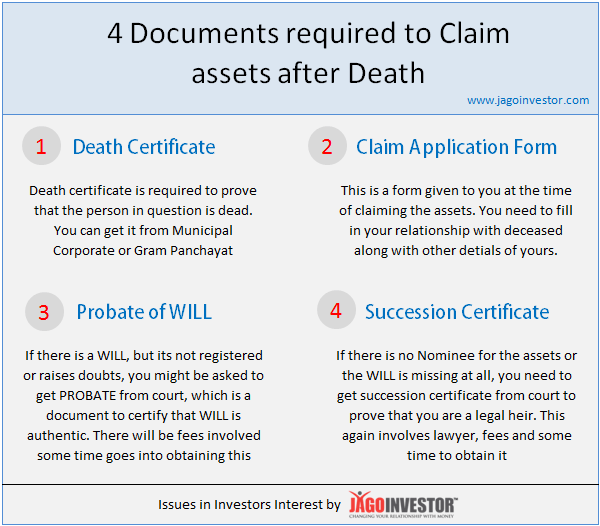
1. Death Certificate

The first thing in the list is Death Certificate. Its one of those documents which will surely be required no matter what. Death certificate is a document which officially certifies that a person is dead . Death certificate also records the date and time of death, which can be a crucial information for things like life insurance claim.

Anyways, as per Registration of Births & Deaths Act, 1969, its mandatory to register death within 21 days of its occurrence and if you are late, then again you will have to do more paperwork and pay some charges. Death Certificate is issued by Municipal Corporation (Urban areas) or Gram Panchayat (in case of rural areas) after proper verification is completed by them.

Death certificate is required by all the institutions (Banks/Fund Houses/Insurance Companies) irrespective of presence of WILL or nominations. So make sure you take death certificate immediately after the demise of the concerned person. Depending on the nature of death, the process of obtaining death certificate changes. If its death at home due to some illness or high age, there not much is required, but if its a death by accident or murder etc, a copy of FIR might also be required.

So make sure you get this document after the death, it might take some good amount of time and running around , so start the process sooner you can.

TIP – You can find state wise procedure and which department to contact on this website. Visit the website and you will see a dropdown at the end of the page.

2. Claim Application Form

Claim form is the form which needs to be filled by you at the time of making the claim. Depending on the asset type, the organisation will provide you. Each bank has its own claim application form, Post Office has its own and mutual funds companies have their own forms. You have to fill in details like – relationship with the deceased and your identity details along with proofs and more.

You also have to give your bank details or other KYC details if the assets has to be transferred to your account like in case of shares in demat account or mutual funds portfolio. Just to give you a feeling of how it looks like  below is a sample claim application form for saving bank account from SBI Bank.

3. Probate of WILL 

One of the most common problems in India is unregistered WILL. Lots of people write a WILL without consulting a lawyer, and do not feel the need to register it. Just because its not registered in the registrar’s office, its bound to raise questions on its authenticity. Lots of times in families, someone claims that there was a WILL written in their favour and then the other parties challenge it saying that its fake. Sometimes two parties come up with their own version of WILL claiming that the other one is fake!.

This all happens because the WILL was not registered. In which case, a “Probate of WILL” is required from Court.

Probate is a way to certify that the WILL is authentic. So if you have to claim an asset and the WILL you have raises questions, you might be asked to get Probate from court to prove that the WILL is authentic.In that case you will have to reach to court, catch a lawyer and apply for Probate. There will be fees to be paid and lots of time might go in this process. Probate will have court seal on it and also the WILL copy will be attached to it.

Below is one comment which I had got long back on a issue which involved fake WILL. You might be able to see the role of Probate here.

My father in law has died without WILL, he left wife, 2 sons and 1 daughter. Both son prepared ZABARDASTI WILL of my mother in law , stating that both sons will get 40 % each & sister will get 20%. This flat is owned by father in law. Can widow’s (mother in laws) WILL will be considered after her death ? Now daughter wants equal share in her fathers property. Is this property is earned or ancestral for mother in law, can daughter give challenge for equal share after her mothers death, or this REGISTERED WILL prepared by mothers will be considered by cour ? plz advice in brief

You can see that the above WILL can be challenged and in that case, a Probate would be asked for to prove that the WILL is authentic or not.

4. Succession Certificate

Succession Certificate comes into picture when there is no written WILL, absense of nomination, or when your name is not on nominee list, but you want to claim the asset because you are legal heir (you know about it, but there is no legal document saying that). At that time, you will have to bring succession certificate from court, which is a proof that you are a valid legal heir. Note that just saying that you are legal heir and bringing some relationship proof will not work here, you have to actually follow the process and get succession certificate to prove that you are a legal heir as per the succession laws.

Once you get succession certificate,  you will be then seen as a valid legal heir and then the assets will be transferred in your name. At times when there is no nomination in place or more than one person comes into picture claiming for assets, then also succession certificate is demanded and the assets are passed on as per that document. Note that only one succession certificate per asset is issued and if there are more than on person claiming the assets, their names will be mentioned in that succession certificate, so its better to support each other and not fight with each other, otherwise situation will get tougher for you.

To get succession certificate, you can reach to district or high court of the jurisdiction, under which the assets fall (bank or property location) . You have to take help of a lawyer and file a petition for obtaining succession certificate and give details like your relationship with the deceased, you date of birth, your other details asked.

Then court will put a notice in newspapers inviting any objections for next few weeks, and if there are no objection, then you are granted the succession certificate. This can take time, money and some rounds to court along with anxiety especially when there is someone else who claims to be the legal heir and you do not have good terms with the other party 🙂 .

So this was all for now.

References –  http://www.bemoneyaware.com/blog/paperwork_documents/

Conclusions

The more work you do on your succession planning part. The lower will be the headache and frustration for your family members later when you leave this world as a surprise. The minimum you can do is fix your nominations for all the assets like bank accounts, life insurance policies, mutual funds, demat account, PPF / EPF and real estate etc. Sir, it takes 1 day! of your life or some hours only. Apart from that, you should write a WILL and get it registered too with help of a good lawyer, spend on it 🙂 .